
Testing NetSuite APIs with Postman: Automating OAuth for Reliable QA

Yes, this image was generated using AI, but look how cool.
NetSuite’s RESTlets unlock a wide range of integration possibilities, allowing external systems to securely access ERP data. By leveraging OAuth 2.0, RESTlets provide a structured approach to building secure, REST-like APIs, making NetSuite a reliable data source for external applications.
To ensure these integrations run smoothly, proper API testing is essential. Postman offers a powerful way to automate OAuth, making it easier to test RESTlet endpoints with real-world scenarios.
In this article, we’ll guide you through configuring Postman to handle OAuth 2.0 authentication for NetSuite, automating the three-way handshake process and streamlining API testing.
Understanding OAuth 2.0 in NetSuite
OAuth 2.0 secures API access by eliminating the need to expose login credentials. Instead, a process called the three-way handshake enables secure authentication and data access. Here’s how it works:
1️⃣ User Initiates Request — The client application requests permission to access data on the user’s behalf.
2️⃣ User Authentication — The user logs in and grants access.
3️⃣ Access Token Issued — The system generates a token, allowing the application to securely retrieve data.
This access token is what external applications (including Postman) use to authenticate API requests without requiring login credentials each time.
Now, let’s see how to automate this process in Postman.
Configuring Postman for NetSuite OAuth 2.0 Authentication
Postman allows OAuth settings at the collection level, meaning every request within the collection can inherit the same authentication token. This makes testing faster, more efficient, and fully automated.
Step 1: Create a NetSuite Integration Record
1️⃣ In NetSuite, create a new integration record.
2️⃣ Enable OAuth 2.0 and save your Client ID and Secret (they won’t be available again).
3️⃣ Head to Postman and create a new collection.
Step 2: Configure OAuth 2.0 Authentication in Postman
In your new collection go to the Authorization tab and set the inputs as follows:
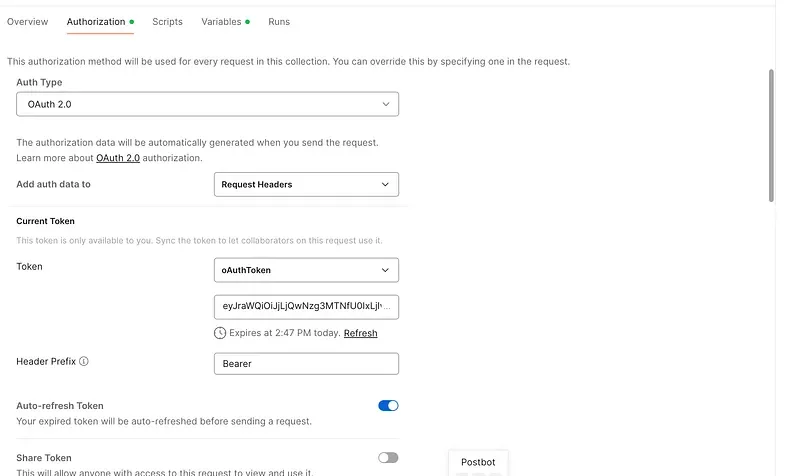
Postman — Collection Authorization tab
Auth Type: OAuth 2.0
Add Auth Data To: Request Headers
Auto-refresh Token: Enabled
Under Configure New Token:
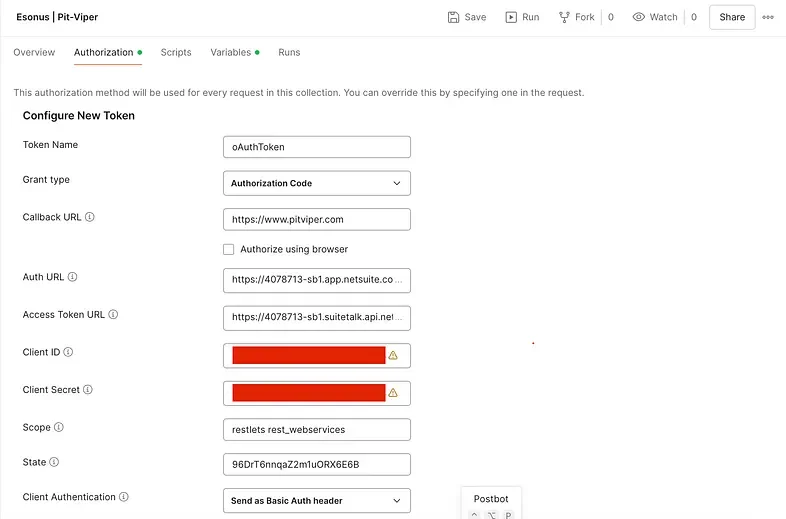
Grant Type: Authorization Code
Callback URL: Any relevant URL
Auth URL:
https://[NetSuiteAccountID].app.netsuite.com/app/login/oauth2/authorize.nlAccess Token URL:
https://[NetSuiteAccountID].suitetalk.api.netsuite.com/services/rest/auth/oauth2/v1/tokenClient ID & Secret: Use the values from the integration record
State: Use any encoded string (e.g.,
96DrT6nnqaZ2m1uORX6E6Awith slight variations for different collections)
Step 3: Generate an Access Token
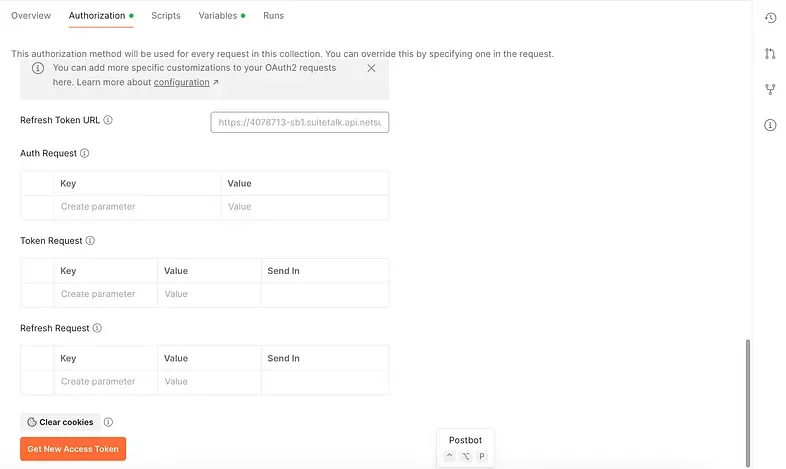
1️⃣ Click Get New Access Token.
2️⃣ Log in to NetSuite via the pop-up and confirm access by clicking continue on the second screen.
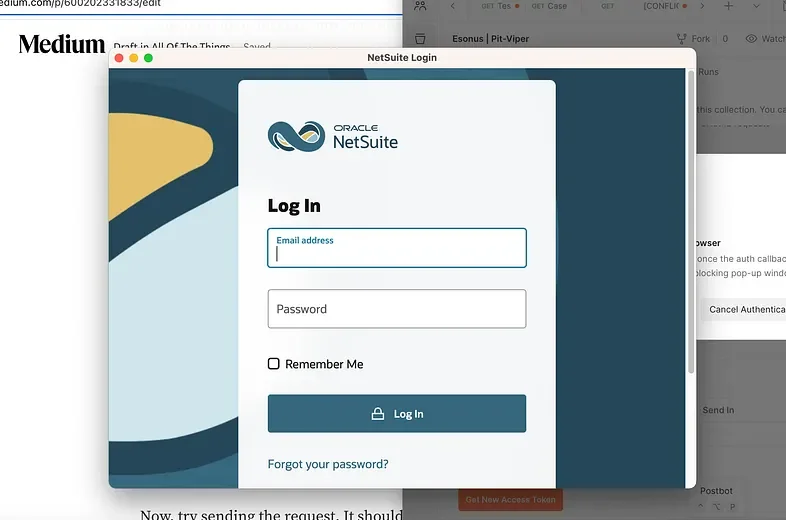
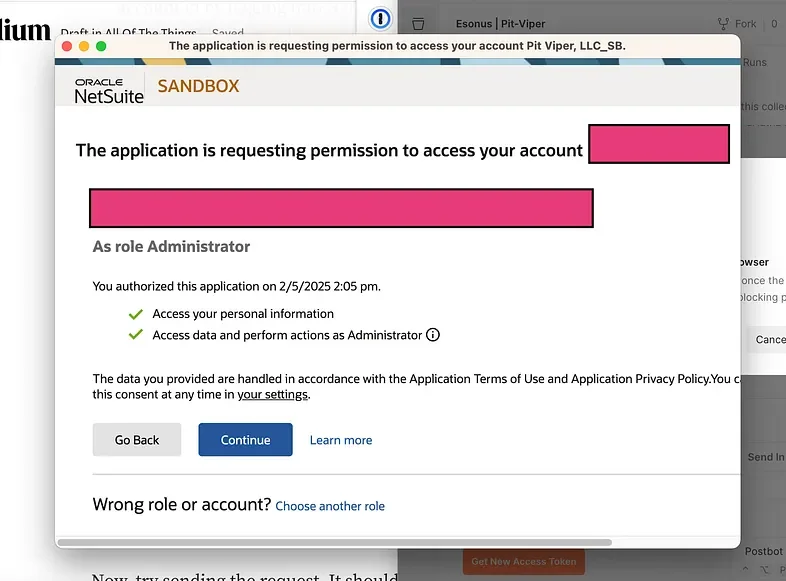
3️⃣ Once authenticated, Postman will notify you that a new token is available.

4️⃣ Set this token as the default by clicking Proceed above and Use token below.
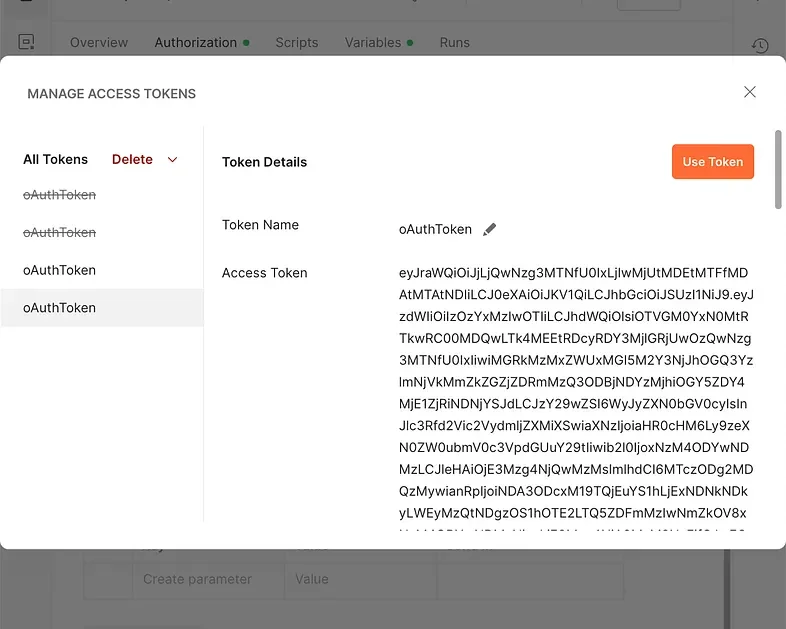
Now, this token is available to be inherited by all of the requests in the collection it was generated for.
Step 4: Test Your RESTlet
1️⃣ Create a new request in Postman.
2️⃣ Set the URL and method to match your RESTlet.
3️⃣ Under Authorization, select Inherit from Parent.
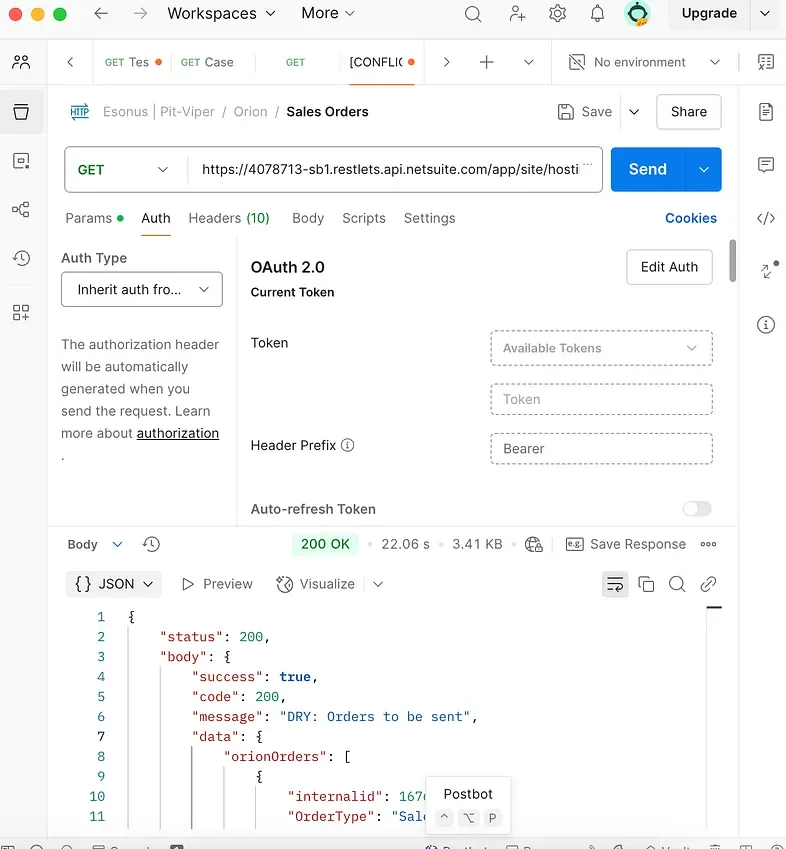
4️⃣ Send the request — your API should respond successfully!
Why It Matters: Secure, Scalable NetSuite Integrations
At AOTT, we specialize in secure NetSuite API integrations that help businesses automate operations and connect external systems with NetSuite ERP. Whether you need:
✅ Custom RESTlet integrations to sync data across platforms
✅ OAuth-secured APIs for real-time business insights
✅ Seamless ERP connectivity for customer portals and external applications
We deliver scalable, secure solutions that keep your business running across all of your systems.
Come talk to us to learn more on what we can do for you in the NetSuite — Third Party Services integration space!